Trader Edge
Information and Ideas to Improve Your Trading
Skip to content
Home
About
Editor Bio
Order Products
AAR Strategy
AAR Subscribers
AI Volatility Edge
AIVE Subscribers
OIS Universal Filter
OISUF Subscribers
Welcome Premium Members
Disclaimer & Terms
Comment Policy
Recommended Reading
Contact
Search for:
←
Look at the Big Picture
SWAMI-JY-ALLF
Posted on
April 11, 2012
by
Brian Johnson
SWAMI-ES-ALLF
SWAMI-S2-ALLF
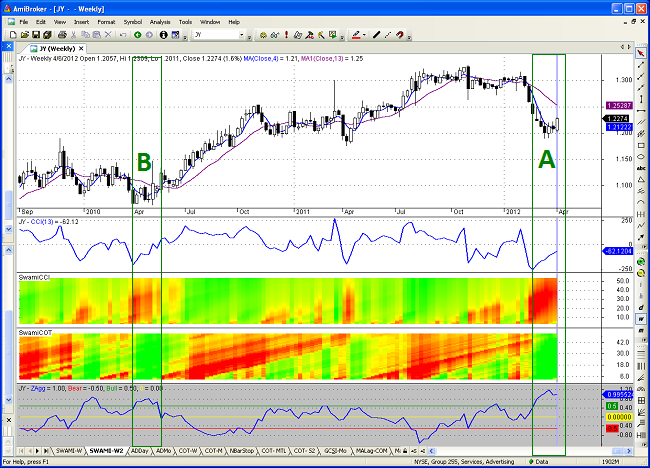
Figure 2: SWAMI-JY-ALLF
SWAMI-JY-ALLF
Bookmark the
permalink
.